1. 背景概要
上篇文章提到用户对安装包的要求:
用户双击安装包以后,让用户确认安装, 然后显示安装进度, 最后提示完成。但是有一下几点要求:
- 不创建桌面图标
- 不创建开始菜单文件夹和图标
- 双击安装后主程序不能直接运行,只能被链接启动
第一版本出去以后,用户觉得不满意,有两条改动:
- 首次安装尽可能的减少对用户的打扰,如果可则 静默安装。
- 应用内检查新版本升级安装的时候完全不显示,即:静默安装
2. 静默安装方式
使用 Inno Setup打包的安装程序,本身已经支持命令行启动静默安装,查看其说明如下:
安装程序接受可选的命令行参数。这些对系统管理员和调用安装程序的其他程序很有用。
/HELP, /?
显示该信息的摘要。如果
UseSetupLdr[Setup]区段指令被设置为no,则忽略。/SP-
在安装开始时禁用“这将安装... 你想继续吗? ”的提示,当然,如果
[Setup]区段的指令DisableStartupPrompt设为yes时,这将无效。/SILENT, /VERYSILENT
指示安装程序静默或完全静默运行。当安装程序在静默运行时,向导和背景窗口将不显示,但安装进度窗口显示。当安装程序在完全静默安装时,该安装进度窗口也不显示。其它的事件被象正常安装一样,例如安装期间显示错误消息框,以及启动时提示(如果你没有在 DisableStartupPrompt 或上面说明的“/SP-”命令行选项中指定)。 如果需要重新启动,以及未使用“/NORESTART”命令(看下面),并且安装程序在静默运行,将显示“立即重新启动吗? ”消息框。如果在完全静默安装模式,将在不询问的情况下重新启动。
/SUPPRESSMSGBOXES
指示安装程序要禁止消息框。仅在结合使用“/SILENT”或“/VERYSILENT”时有效。 在默认情况下的响应,其中有一个选择是: 在“保留新文件吗?”情况,选择“是”。 在“文件存在,确认覆盖。”情况,选择“否”。 在“终止/重试”情况选择“终止”。 在“重试/取消”情况选择“取消”。 在 DiskSpaceWarning/DirExists/DirDoesntExist/NoUninstallWarning/ExitSetupMessage/ConfirmUninstall 情况选择“是”(=继续)。 在 FinishedRestartMessage/UninstalledAndNeedsRestart 情况下选择“是”(=重启)。 建议选择 PrivilegesRequiredOverridesAllowed=dialog 状态。 有 5 种消息框不能禁止: “关于安装程序”消息框。 “退出安装程序吗?”消息框。 当安装程序要求插入新磁盘并在找不到磁盘时,显示 FileNotInDir2 消息框。 安装(或卸载)之前显示的任何(错误)消息框都可以读取命令行参数。 [Code] 显示的任何任务对话框或消息框都支持函数
TaskDialogMsgBox和MsgBox。
根据其说明,那么在升级安装的时候可以采取这种命令行静默安装:
ProcessStartInfo startInfo = new ProcessStartInfo
{
    FileName = "DevWiki.exe",
    Arguments = "/SP- /VERYSILENT /SUPPRESSMSGBOXES",
    UseShellExecute = false,
    RedirectStandardOutput = true,
    RedirectStandardError = true,
    CreateNoWindow = true
};
Process process = new Process();
process.StartInfo = startInfo;
process.Start();
3. 非命令行如何静默安装?
客户要求不使用命令行的方式启动,且要求静默安装。鉴于Inno Setup的限制,用户双击安装包达成类似于静默安装方式需要在 InitializeWizard()回调函数中处理:
procedure InitializeWizard();在启动时使用该事件函数来改变向导或向导页面。你不能在它被触发时使用
InitializeSetup事件函数,因为向导窗体尚不存在。
即在这个回调函数中修改安装想到界面:
[Code]
procedure InitializeWizard();
begin
    WizardForm.BorderStyle:=bsNone;
end;

function ShouldSkipPage(PageID: Integer): Boolean;
begin
    Result := True
end;

procedure CurPageChanged(CurPageID: Integer);
begin
    WizardForm.ClientWidth := ScaleX(0);
    WizardForm.ClientHeight := ScaleY(0);
    if CurPageID = wpWelcome then
        WizardForm.NextButton.OnClick(WizardForm);
    if CurPageID >= wpInstalling then
        WizardForm.Visible := False
    else
        WizardForm.Visible := True;
end;
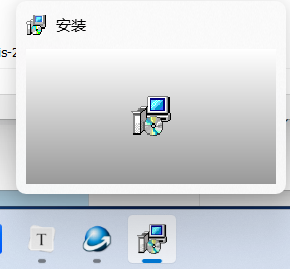
此种修改,打包完成后双击安装包会有一个任务栏图标:

下面是修改后的脚本:
; 脚本由 Inno Setup 脚本向导 生成!
; 有关创建 Inno Setup 脚本文件的详细资料请查阅帮助文档!

#define MyAppName "DevWiki" ; 设置应用程序名称
#define MyAppVersion "1.0.0" ; 设置应用程序版本
#define MyAppPublisher "DevWiki" ; 设置应用程序发布者
#define MyAppURL "http://blog.devwiki.net" ; 设置应用程序网址
#define MyAppExeName "MyProg.exe" ; 设置应用程序的可执行文件名称

[Setup]
; 注: AppId的值为单独标识该应用程序。
; 不要为其他安装程序使用相同的AppId值。
; (若要生成新的 GUID,可在菜单中点击 "工具|生成 GUID"。)
AppId={{15E14FAA-0CE2-4084-9275-728CF14F09E4} ; 设置应用程序的唯一标识符
AppName={#MyAppName} ; 使用上面定义的应用程序名称
AppVersion={#MyAppVersion} ; 使用上面定义的应用程序版本
;AppVerName={#MyAppName} {#MyAppVersion}
AppPublisher={#MyAppPublisher} ; 使用上面定义的应用程序发布者
AppPublisherURL={#MyAppURL} ; 使用上面定义的发布者网址
AppSupportURL={#MyAppURL} ; 使用上面定义的支持网址
AppUpdatesURL={#MyAppURL} ; 使用上面定义的更新网址
DefaultDirName={autopf}\{#MyAppName} ; 设置默认安装目录
DisableProgramGroupPage=yes ; 禁用程序组选择页面
DisableReadyPage=true ; 禁用"准备安装"页面
DisableDirPage=true ; 禁用目录选择页面
AllowNoIcons=true ; 允许不创建桌面图标和快速启动图标
UsedUserAreasWarning=no ; 禁用用户区域警告
;LicenseFile=D:\Code\InnoSetup\安装许可.txt
;InfoBeforeFile=D:\Code\InnoSetup\安装之前.txt
;InfoAfterFile=D:\Code\InnoSetup\安装之后.txt
; 移除以下行,以在管理安装模式下运行(为所有用户安装)。
PrivilegesRequired=lowest ; 设置所需的权限为最低
;PrivilegesRequiredOverridesAllowed=dialog ; 设置权限要求的覆盖方式
OutputDir=D:\Code\InnoSetup ; 设置输出目录
OutputBaseFilename=mysetup ; 设置输出文件的基本名称
Compression=lzma ; 使用LZMA压缩
SolidCompression=yes ; 启用实体压缩
WizardStyle=modern ; 使用现代风格的向导

[Languages]
Name: "chinesesimp"; MessagesFile: "compiler:Default.isl" ; 设置语言为简体中文
;Name: "english"; MessagesFile: "compiler:Languages\English.isl" ; 设置语言为英文

[Tasks]
;Name: "desktopicon"; Description: "{cm:CreateDesktopIcon}"; GroupDescription: "{cm:AdditionalIcons}"; Flags: unchecked ; 创建桌面图标任务
;Name: "quicklaunchicon"; Description: "{cm:CreateQuickLaunchIcon}"; GroupDescription: "{cm:AdditionalIcons}"; Flags: unchecked; OnlyBelowVersion: 6.1; Check: not IsAdminInstallMode ; 创建快速启动图标任务

[Files]
Source: "C:\Program Files (x86)\Inno Setup 6\Examples\MyProg.exe"; DestDir: "{app}"; Flags: ignoreversion
; 注意: 不要在任何共享系统文件上使用“Flags: ignoreversion” ; 复制应用程序文件到目标目录

[Icons]
;Name: "{autoprograms}\{#MyAppName}"; Filename: "{app}\{#MyAppExeName}"
;Name: "{autodesktop}\{#MyAppName}"; Filename: "{app}\{#MyAppExeName}"; Tasks: desktopicon
;Name: "{userappdata}\Microsoft\Internet Explorer\Quick Launch\{#MyAppName}"; Filename: "{app}\{#MyAppExeName}"; Tasks: quicklaunchicon

[Run]
;Filename: "{app}\{#MyAppExeName}"; Description: "{cm:LaunchProgram,{#StringChange(MyAppName, '&', '&&')}}"; Flags: nowait postinstall skipifsilent

[Code]
procedure InitializeWizard();
begin
    WizardForm.BorderStyle:=bsNone;
end;

function ShouldSkipPage(PageID: Integer): Boolean;
begin
    Result := True
end;

procedure CurPageChanged(CurPageID: Integer);
begin
    WizardForm.ClientWidth := ScaleX(0);
    WizardForm.ClientHeight := ScaleY(0);
    if CurPageID = wpWelcome then
        WizardForm.NextButton.OnClick(WizardForm);
    if CurPageID >= wpInstalling then
        WizardForm.Visible := False
    else
        WizardForm.Visible := True;
end;
4. 后记
如果你有更好的方式,欢迎留言或者关注我公众号后加入微信群一起交流。
文中使用的 Inno Setup有中文版本,关注我的微信后回复:InnoSetup 获取中文版本。


